Speck Chronicles: Refit Begins
In August 2020, Speck become my boat. After survey, I found myself with 11 tons of boat sat on the hard for just a few days, not leaving much time to complete any work that I wanted to do.
There were a couple of important jobs to knock off that week:
- New bottom paint (the yard insisted on doing this - but the price was very reasonable)
- Get the prop off, and down to Plymouth to have a chip repaired.
- Install a new depth + speed transducer
- Clean, Compound, Polish & Wax the hull using the MaineSail method - this should be your bible for polishing a hull.
The Professionals
Those few days on the hard were a whirlwind of activity. Hingham Shipyard were reasonably priced for the haul & service work, but any extra days needed on the hard would come at an extreme premium. I wasn’t too unhappy to hear that the yard insisted on doing the bottom job - I’ve moved on from DIY-ing this task. At the time, I was very pleased with the job the yard did sanding the old bottom paint fair, and painting 2 coats of ablative bottom paint. The paint, however, subsequently failed within 6 months of application. I’m not sure if this was a bad batch of paint, or because the boat was left in a high-growth area of Florida for ~2 months without seeing a bottom diver - but this was disappointing to see.
Here’s the yard bill for that haul:
Bottom Paint 42' LOA: $756
Bottom paint 2gal: $400
Long haul & Block for Survey: $1050
Extra days rate: $210 (used 0 days extra)
Total: $2,206
(Aside: $1,156 all in within the Boston area for a bottom job at a full service yard is outrageously cheap. I’m presently paying over $2k in North Carolina for the same job)
I’d gladly use Hingham Shipyard for work in future. They did an excellent job sanding the hull in preparation for paint - and I don’t believe the bottom paint failing to be any fault of their own.
DIY Jobs
The Prop
First up on the list of DIY jobs was to remove the prop, and have it repaired - cue a good hour with a blowtorch and my trusty prop puller. Props are an interference fit, and it’s never an easy job - complicated by the fact Beneteau use a proprietary prop lock washer & nut on their shafts which differs from a standard shaft, castle nut and cotter pin setup. This needed to be sourced in short order - but thankfully the excellent folks at BoatZincs.com are actually based in Massachusetts, so I could drive to their location & pick up the part. Again, MaineSail comes to the rescue with the guide for removal & lap fitting a prop.
The prop was repaired by New England Propeller Inc., in Plymouth MA. They were able to measure the pitch of the prop, clean it, and repair a chip to the prop, all with a 2 day turnaround. Total cost was $280. They warned me the brass of the prop was pink, and had little life left. (As predicted, the prop developed an even larger chip within about 12 months of use.)
Depth & Speed Transducer
The depth transducer in place on Speck was an ancient form factor, which meant I had to drill a larger hole to fit the new style Airmar transducers. I’ve got a technique I’m particularly proud of for enlarging thru-hulls:
- Measure the existing size hole, and use a hole saw to drill a wooden plug from some plywood of equal diameter.
- Find the appropriate sized hole saw for the new opening, and onto the drill bit, attach the smaller sized wooden plug from step 1.
- Use the plug as a guide to keep the drill rotating around the existing hole, and the teeth of the larger hole saw will drill an evenly sized larger hole.
The new transducer was connecting to a NMEA 2000 network - so I chose the Airmar DST 800 triducer, which takes both depth, speed, and water temperature, and repeats valid NMEA 2000 sentences to any display / listener on the network. Sounds great, right? Well, the DST 800 has a reputation for reliability issues, and while depth & temp work to this day, speed stopped working after only a month or two, and no amount of cleaning the paddlewheel would fix things. Save your money - terrible hardware. I’m waiting until the ultrasonic gear comes down in price.
Clean, Compound, Polish, Wax
Speck’s gelcoat wasn’t the shiniest - and I naively thought some elbow grease would restore it to former glory.
My technique & choice of products here largely follows the MaineSail method.
Products of choice for this job are:
- Boat soap: Any bio-friendly, e.g. StarBrite
- Acid cleaner for stains: MARYKATE On Off Hull Cleaner
- Compound: 3M Marine Rubbing Compound
- Polish: 3M Finess-it II Glaze
- Wax: Collinite Fleetwax
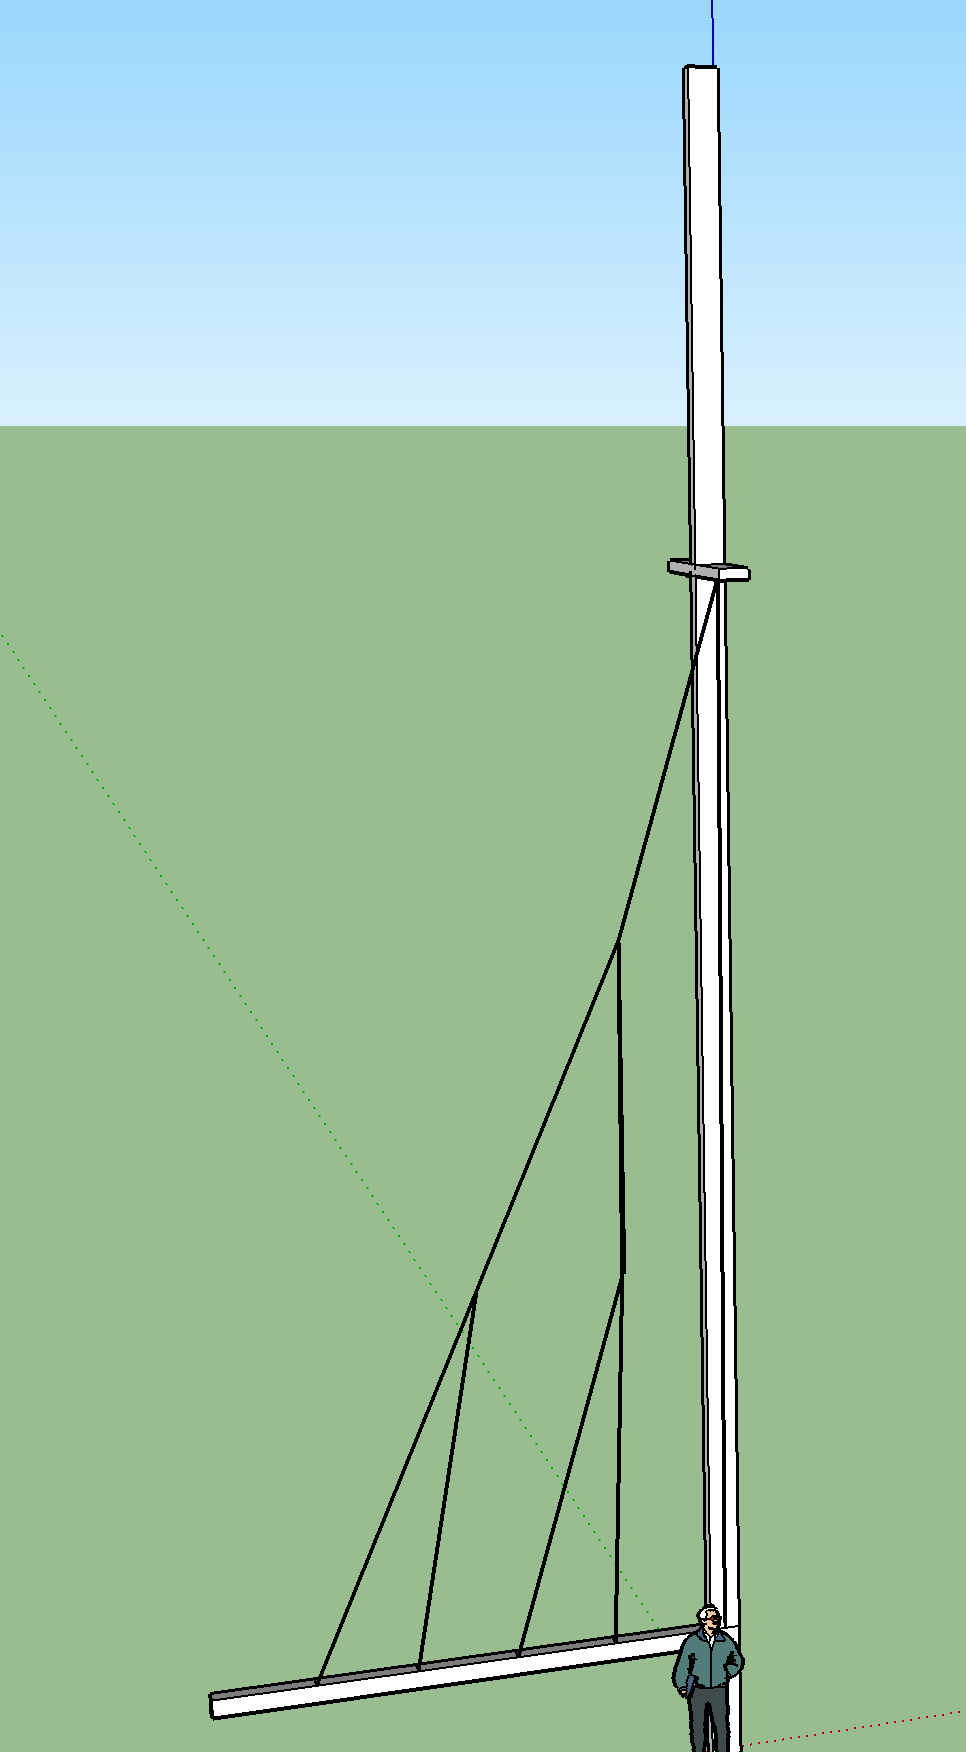
Because Speck is 7’ 3” off the ground, the only way to effectively polish the boat is to bring in some form of scaffolding.
By the time all was said and done, there was certainly a shine to the hull, but the gel coat is ultimately 35 years old, and coming to the end of it’s ability to produce any real luster.
Launched
This was the end of the on-the-hard portion of the refit. Speck was re-launched 12th August 2020, and motored home to Boston Harbor Sailing Club.
The next month consisted of a bunch of sails around Boston Harbor, learning the ins & outs of the boat. How she liked to be traveller up all the time, when she needed reefing down, and just how useful the Cunningham was.
Pay it Forward
In this first month, I also managed to get in contact with a few fellow First 42 owners online, who were a source of a list of some great ideas for future upgrades.
One such owner, Alan Rudolph had me down to Rhode Island to photograph his boat stem to stern, which gave me great reference material for a bunch of future upgrades. He was also kind enough to sell me his genoa & 2 old mains for the very reasonable sum of $500.
These sails still had some life left in them - in fact, the Doyle Mainsail is still in use aboard to this day.
It’s always great to see the sailing community pay a favor forward - thanks Alan.
During this first month sailing Speck, one unfortunate issue was uncovered: The engine was leaking diesel, at a rate of about a drip a second.
After some diagnostics with a mechanic friend, we figured the problem part the CAV Injection Pump.
The mess could be cleaned up after short motoring sessions, but this was a problem that needed addressing.
Unfortunately, Beneteau, in their infinite wisdom, did not design the engine bay with any sort of maintenance in mind, and to remove the pump would involve removing the alternator, water pump, and exhaust manifold - a little beyond what I was willing to attempt in the middle of sailing season.
I knew of a yard in Maine which had done great work on the refit of a friend’s Bristol, so arranged a cruise to Acadia which ended with a trip to the yard to have the pump rebuilt.
First Offshore Trip
The first trip was to be a repeat of a previous route I’d taken, Boston to Southwest Harbor in Acadia National Park. Miserable, rainy, foggy weather along route diverted us into Portland for a night, where Speck got to hang out with the super yachts for a few hours. Then, it was onwards to Southwest Harbor, where on approach we ran in to the first heavy winds I’d had the boat in. Reef 1 at 20kts of wind quickly grew to reef 2 at 30kts sustained - and I quickly learned the importance of running backstays. Speck handled the conditions like a champ, a different world to sailing a Catalina 30 in such conditions. While I believe these are not structural to the mast of Speck, I sure felt a lot better when the backstays were loaded up, and the aluminum mast stopped pumping like a noodle.
Cruising Maine
This delivery was the beginning of a glorious week-long cruise around Acadia National Park with Katharine. We ended up stopping in:
- Southwest Harbor (Beales Lobster Pier is a must)
- Northeast Harbor (my all-time favorite harbor in east-coast USA)
- Bar Harbor (avoid by boat — rolly ass harbor, but the sail there is pretty)
- Isle au Haut (Beautiful, off-the-beaten-track part of the national park - snag a rental moorings in the thoroughfare if you can, there’s only 2 available)
- Rockport
During this time, we also had our first real taste of what it was like to double-hand this 42’ racer cruiser as a couple. It proved all-so-manageable, and with the extra space down below, things started to feel much less like the camping-on-the-water experiences of past.
We left the boat in Rockport, for the yard to repair the injector pump.
Cian’s First Boat Yard
I’ve long hesitated to employ marine professionals to perform works on the boats I’ve owned. In this blog, I’ve called out vendors I’ve had good experiences with, but for every one good experience, there’s usually been two bad ones.
Where feasible, I always prefer to attempt tasks myself - but I’m occasionally willing to admit when something is beyond my pay grade - installing a new furler, re-rigging a boat, or in this case, removing, rebuilding and re-installing the injector pump.
The yard in question sent the pump to Transatlantic Diesels to be rebuilt - and these folks are the de-facto expert on all things Perkins on the east coast. I’ve used them since - an excellent bunch.
Unfortunately, this was where things went awry. In reinstalling the pump, the boatyard mechanic on the job downed tools & quit, leaving another mechanic to come along, put together the pieces, and finish the job.
This lead to a 100% overage on the labor bill, since I wound up paying for the hours of both mechanics - and in communicating my disappointment with the yard, they were unprofessional, and perhaps a tad emotional in their response.
My conclusions from this experience:
- This yard was a great place to haul out & undergo a large boat refit, but for a shorter, time sensitive & ad-hoc repair, look elsewhere.
- Always budget for up to an 50% labor overage on repair line items. (But not 100%!) Boats are bastards for frozen-in-place fasteners, and surprises buried behind bulkheads. Not every job on a refit list goes over budget, but when one does, at least you’re prepared.
- This yard lost out on a later, more substantial refit of Speck because of this experience. On reflection, I’d probably still recommend them to others, with some caveats. ’tis a funny world. I didn’t feel it appropriate to name and shame - I’m happy to share the downlow in private, shoot me a note.
The yard bill for removing, rebuilding and reinstalling the injector pump came to $3,270.
Back to Boston
After the painful yard experience, it was time to load Speck up with a bunch of friends, and sail back to Boston. This was my first time loading up the boat with crew - we were 6 POB, and Speck comfortably accommodates 6 sailors into her interior. We ran a 2-on, 4-off watch schedule, with 2 people always on deck - a comparable luxury compared to some trips. We also got to introduce a newer sailor to the magic of offshore sailing - always a favorite of mine.
On returning to Boston, it was back to improvements to the boat.
The Infamous Cookie Monster
By now, you’ll undoubtedly have noticed Speck has a very large blue stern structure made of Thailand’s finest blue PVC, hosting some solar panels and a water collection system. Over time, it even gained a nickname - The Cookie Monster. It was utilitarian for sure - allowing 400w of uninterrupted, unobstructed solar power generation during daylight hours. It was an engineering masterpiece, the PVC glued together & then lashed to the railing securely with no permanent attachment point. It was also a fucking eyesore.
My first reaction was to either design an aluminum solar arch, or buy an off the shelf product.
In the end, the self-steering vane wound up interfering with most arch designs, so the project was shelved, to be addressed at a later date. The Cookie Monster received a stay of execution.
Stack Pack
Somehow, the previous owners sailed Speck around the world without either a functioning sail cover, or any lazy jacks to flake the sail on lowering. Far more patience than I..
You’ll recall from a past blog post, one of my objectives was to have a boat I could easily sail 5 times a week - and to do this, a stack pack was firmly in my plans.
Of course, I also had some fairly casual plans to race the boat - so I’d need something which could fold away as needed in order to reduce windage.
I was very pleased with the Doyle sail bag on my Catalina, so after a small handful of quotes, I went with Doyle.
I was thrilled with the end product - in fact, I’ve always been very happy with the work of Doyle Sails in Salem.
Were I to purchase a stack pack again, I’d still do a few things differently:
- I’d insist a sailmaker come and measure the boat in person - alas a hard sell when you’re not buying an entire wardrobe of sails. My stack pack fits, but I have a niggling feeling somebody hands-on would have sized something even better still
- A mesh bottom to the bag, in order to drain water from the sail & improve ventilation would be a nice feature
- A built in snap for rolling & folding the stack pack up for racing would be nice to have - I use sail ties around the boom.
Lazy Jacks
I was eager to put my newfound dyneema splicing skills to good use, so designed a series of lengths of dyneema line, joined by low friction rings to serve as lazy jacks.
Dyneema is a particularly slippery rope, and when dropping, the sail passes through the lines smoothly.
 One of the common issues with lazy jacks is the sail catching on the lazy jacks when hosting or reefing.
To overcome this problem, I had placed the attachment point for the lazy jacks approx. 1ft out on the upper spreader, giving a wider spread to the upper portion of the lazy jacks.
One of the common issues with lazy jacks is the sail catching on the lazy jacks when hosting or reefing.
To overcome this problem, I had placed the attachment point for the lazy jacks approx. 1ft out on the upper spreader, giving a wider spread to the upper portion of the lazy jacks.
Lastly, the design needs to support lowering the stack pack (which the lines are attached to), so the lazy jacks are doubled back from the spreader to the base of the mast, where they attach to a horn cleat. There is enough spare line to lower the lazy jacks all the way to the topmost V, without need for a trip aloft.
Aside: I’ve since read a 2-pronged critique of this technique worth considering:
- High strength line is inappropriate for use in lazy jacks - in the event of a snag, the line should be the weakest link.
- Lazy jacks should never be connected to spreaders - especially when combined with dyneema. In the event of a snag, a downward force is placed on the spreaders, which become the
fuse, or potentially weakest link.
My thoughts: To point 1, I call bullshit. The woven loops in the stack pack will break before anything else. To point 2, I’ll be having a long, hard think about relocating the attachment point of my lazy jacks for sure.
Autopilot
Another criteria for Boat 2.0 was a boat which could be easily single handed. While the boat came with a self-steering wind vane, this is a device for long ocean passages, essentially useless for short-tacking solo around the harbor. Were money no object, I’d buy an NKE pilot - but of course, it is. The boat had both an existing Raymarine SeatalkNG and NMEA 2000 network - so options from Raymarine, Garmin and B&G would all have been plug & play. The latest generation Raymarine included a 9-axis gyrocompass sensor. I only know what 6 of the axis do - but how cool is that! A big upgrade from previous models. It was also $1k cheaper than the equivalent from Garmin, and half the price of a B&G setup - so the choice was fairly natural. The hardware sat on board for over a month before finally completing the install - a reasonably involved process. The calibration was a breeze, and the pilot went on to steer flawlessly to this day.
Aside: The Aluminium mounting bracket for the linear drive ram developed a creaking sound, and was later upgraded - documented in a subsequent post. Always oversize the attachment point for your ram, by an order of magnitude.
WiFi Instrumentation
Having an NMEA network with data points available was a novelty - and getting this information available to networked phones, tablets, and the nav computer was on the wishlist. The YDNR-02 fit the bill, and $289 later this plug-play device was sitting at the nav table. The YDNR repeats instrumentation data over WiFi, and provides some nice dashboards out-of-box to be able to monitor conditions from down below while off-watch - happy days!
Getting ready to go south
All these upgrades weren’t put in place to haul Speck at the end of the season, and have her sit in a freezing cold boatyard all winter - no sir. A plan was formulating to live aboard Speck for the winter months, and get out of dodge (or at least Boston) for the coldest of the winter. I had secured a slip in St. Augustine, Florida - which would become our winter home.
With the list of upgrades complete, it was almost time to set off for destinations south - so I gathered the crew for leg 1, and got the boat ready to begin.
Week of departure, and crisis strikes: First, in trying to better secure the raw water strainer, the hose barb breaks clean off the plastic strainer. Cue an overnight order from defender.
Then, in motoring to fuel the boat up the night before departure, I notice a substantial salt water leak from the exhaust elbow. It had rusted through - a new part would take several days to arrive.
A quick trip to Autozone, and some JB weld later - and a repair was in place which would ultimately last the entire way to Florida. The power of JB Weld!
It wasn’t pretty, but it worked.
October 16th, we set off from Boston for leg 1, nonstop to Virginia - but more about the trip south in my next post.